This article is the continuation of WordPress with Docker, AWS (ECS, Code Pipeline, Load Balancer, RDS, EFS) Complete Series. For better understating, please start from the beginning of the series.
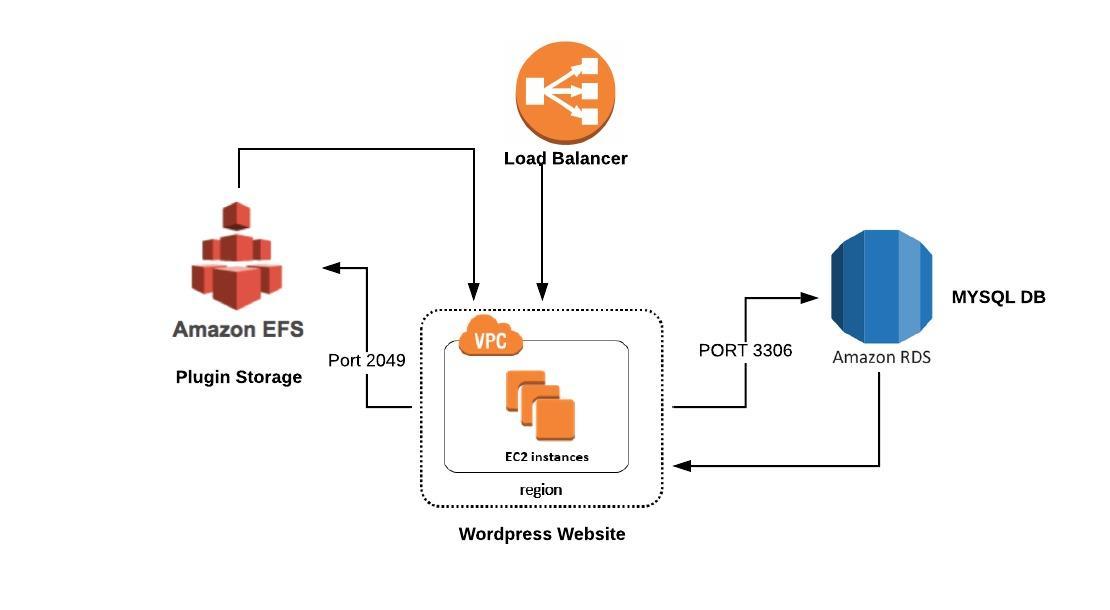
In this article, we will create the Load Balancer which will sit on top on WordPress instances and balance the load as per increasing the requests from users. The ultimate reason for this approach is to make your website scalable and always available for our clients.
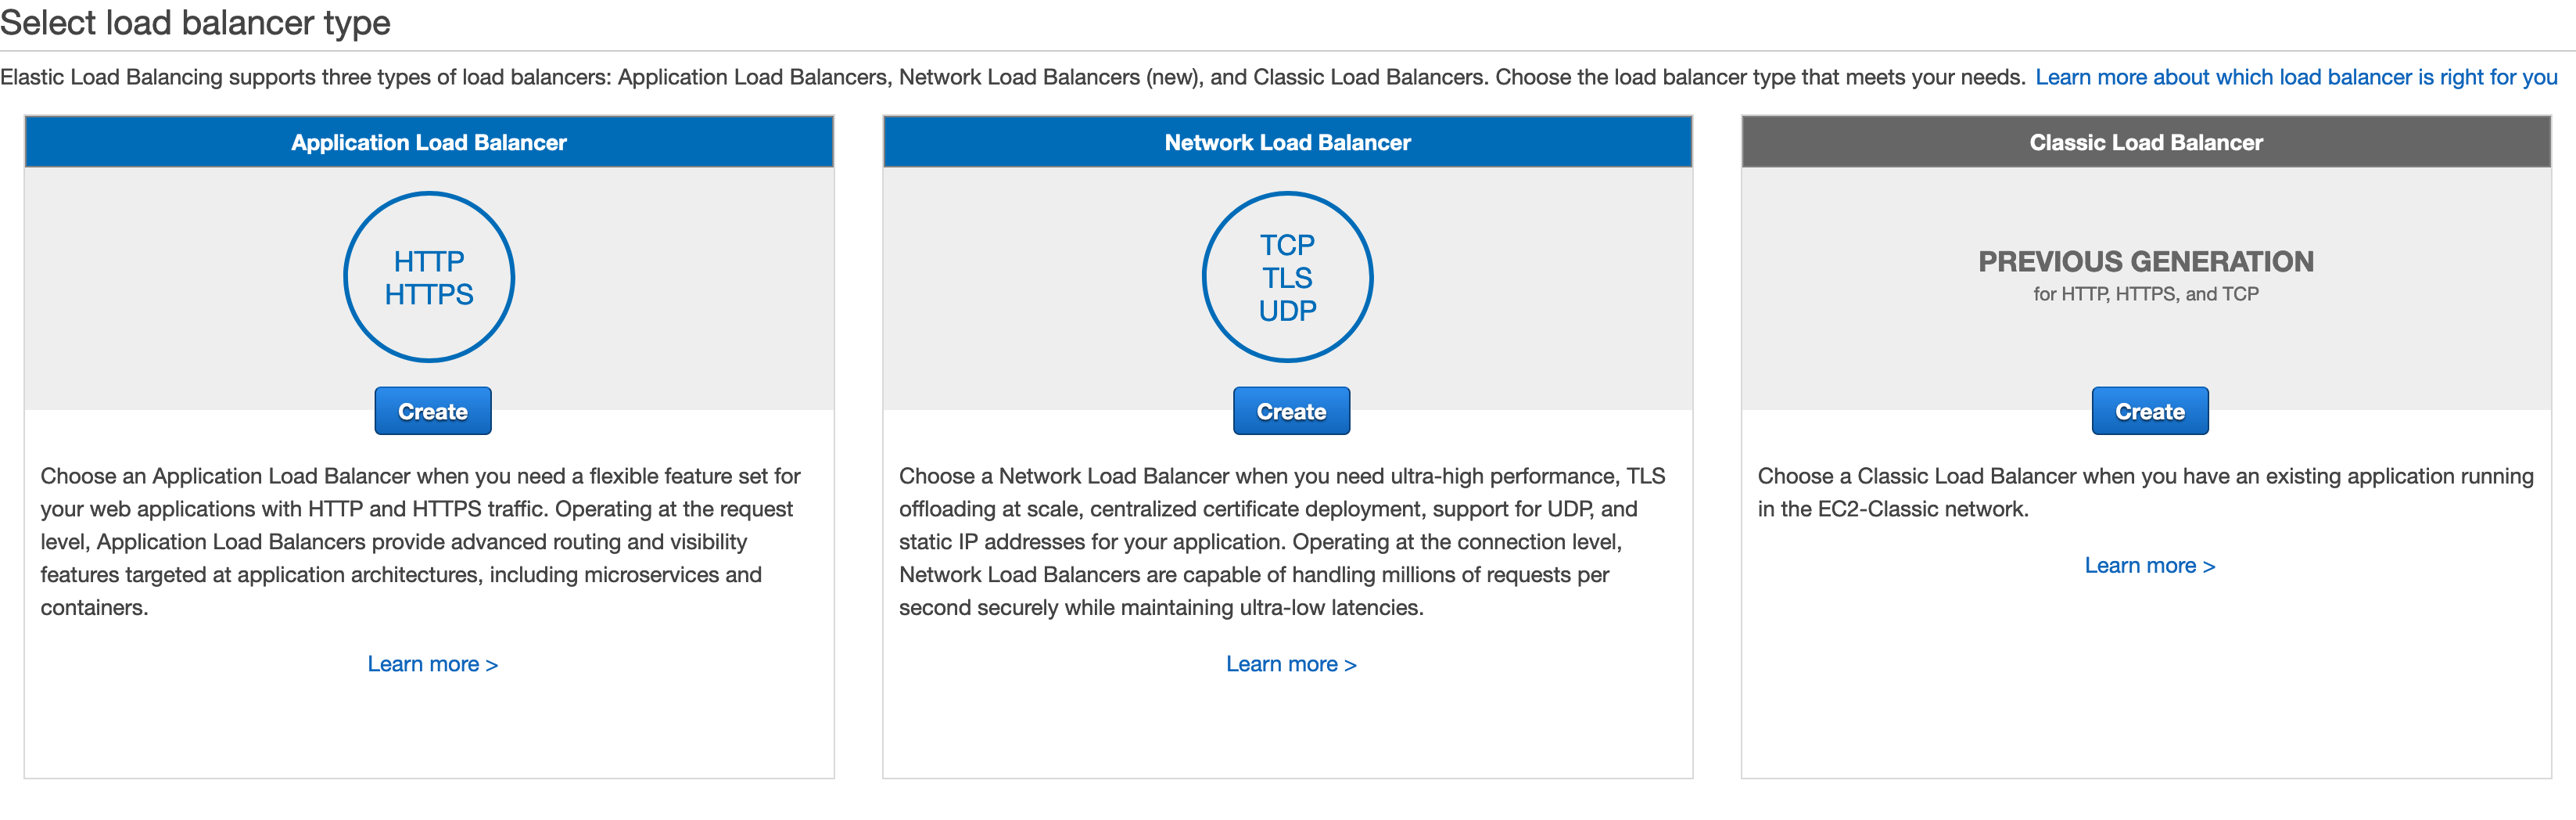
From EC2 console Select Load Balancer and click on Create Load Balancer


On this step, select HTTP/HTTPS
Step: Configure Load Balancer and VPC

Make sure you select the correct VPC on this step.
Step: Configure Security Groups
On this step, we will use the Security Group we created earlier for our Load Balancer.

Step: Configure Routing (Target Group)
Target Group job is to ping your instances periodically to make sure that they are healthy. If it does not receive the response from any of the instance, it raises the alarm and the instance is marked as unhealthly by the Load Balancer and an action can be taken accordingly.

by doing all these steps, we have successfully created the mechanism for a scalable WordPress website that can serve as thousands of clients with any amazing user experience.