
This article is the continuation of Rails + Sidekiq + Docker Application for AWS (ECS, ECR, RDS, Codepipeline and more) complete series. For better understating, please start from the beginning of the series.
As mentioned before, Bastian instance will allow us to connect to our Rails instance, RDS (MYSQL) and Redis cache for sidekiq from our local machine. It can be very handy when it comes to test services or troubleshoot issues.
Create Bastian instance
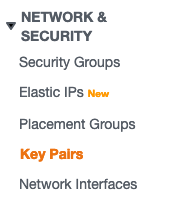
In the EC2 console, Click on Key pairs and select Create Key Pair.


Download the PEM file and keep it safe ! There is no backup of this file anywhere.
Let’s create our Bastian instance.
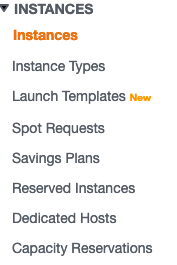
Click on Instances from the EC2 console and select Launch instance.
We are using ubuntu 18 Free tier version because the bastian host is not doing much except enabling us to connect/configure/troubleshoot AWS services such as RDS and Redis from our local machine.

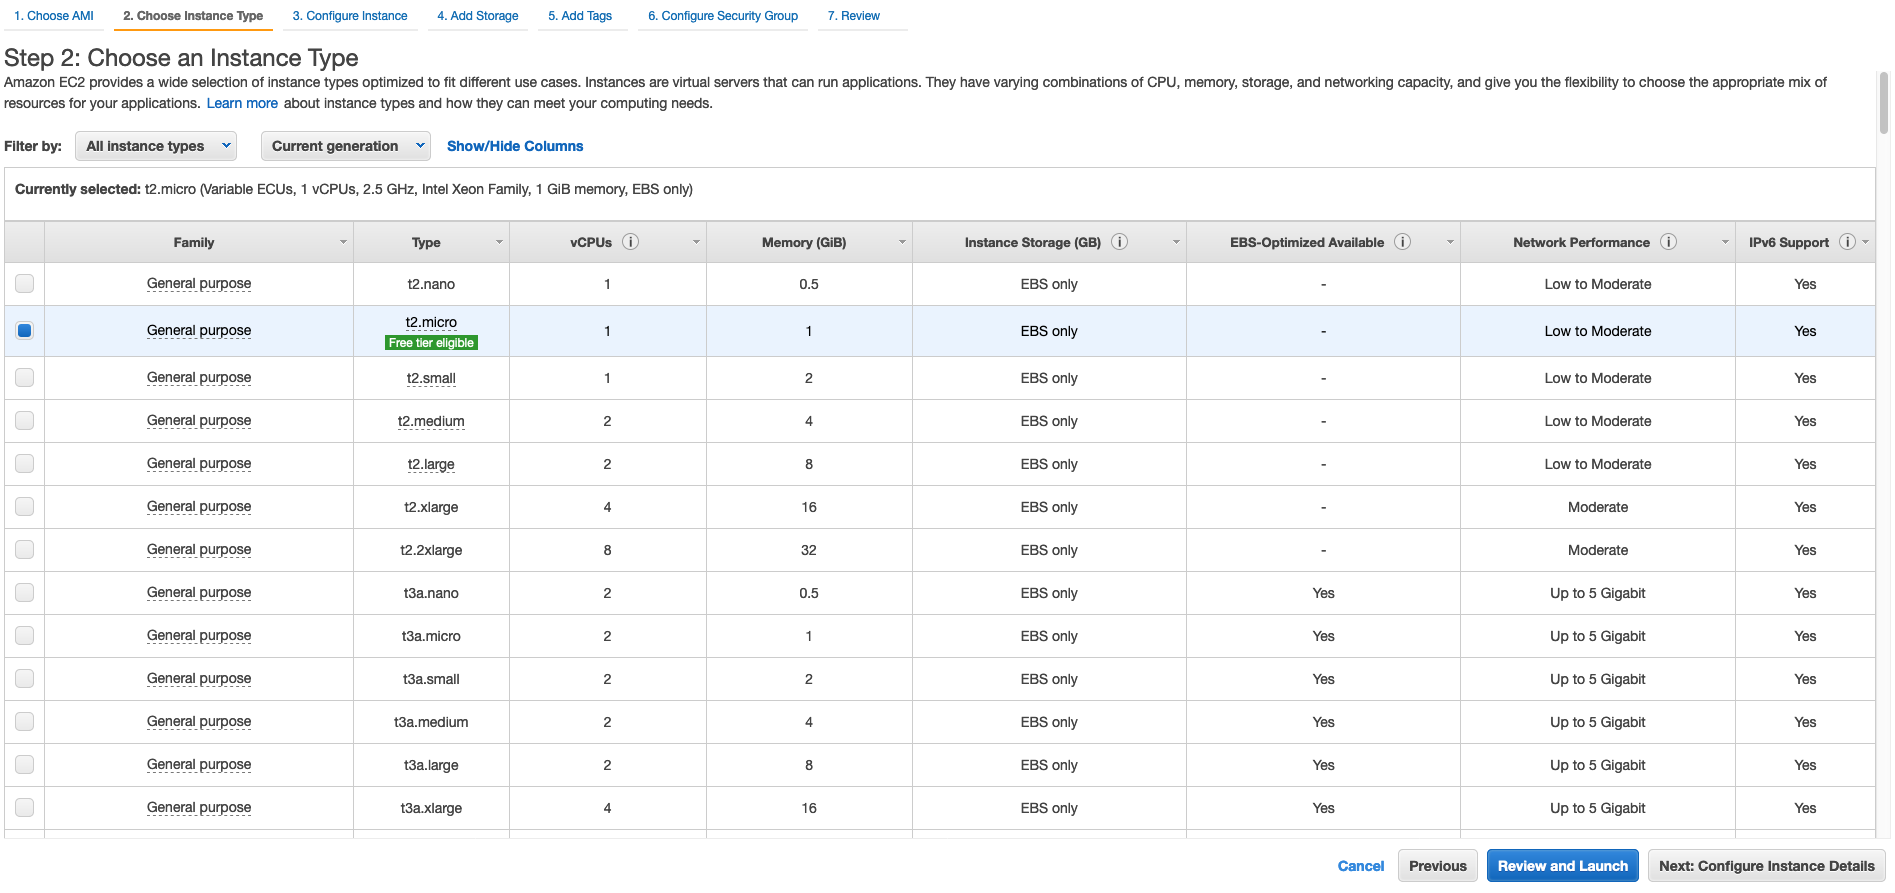
Select free Tier in instance type section and hit configure instance details at the bottom

In the configure Instance section, make sure you select the same VPC you have used while creating all the Security groups earlier.


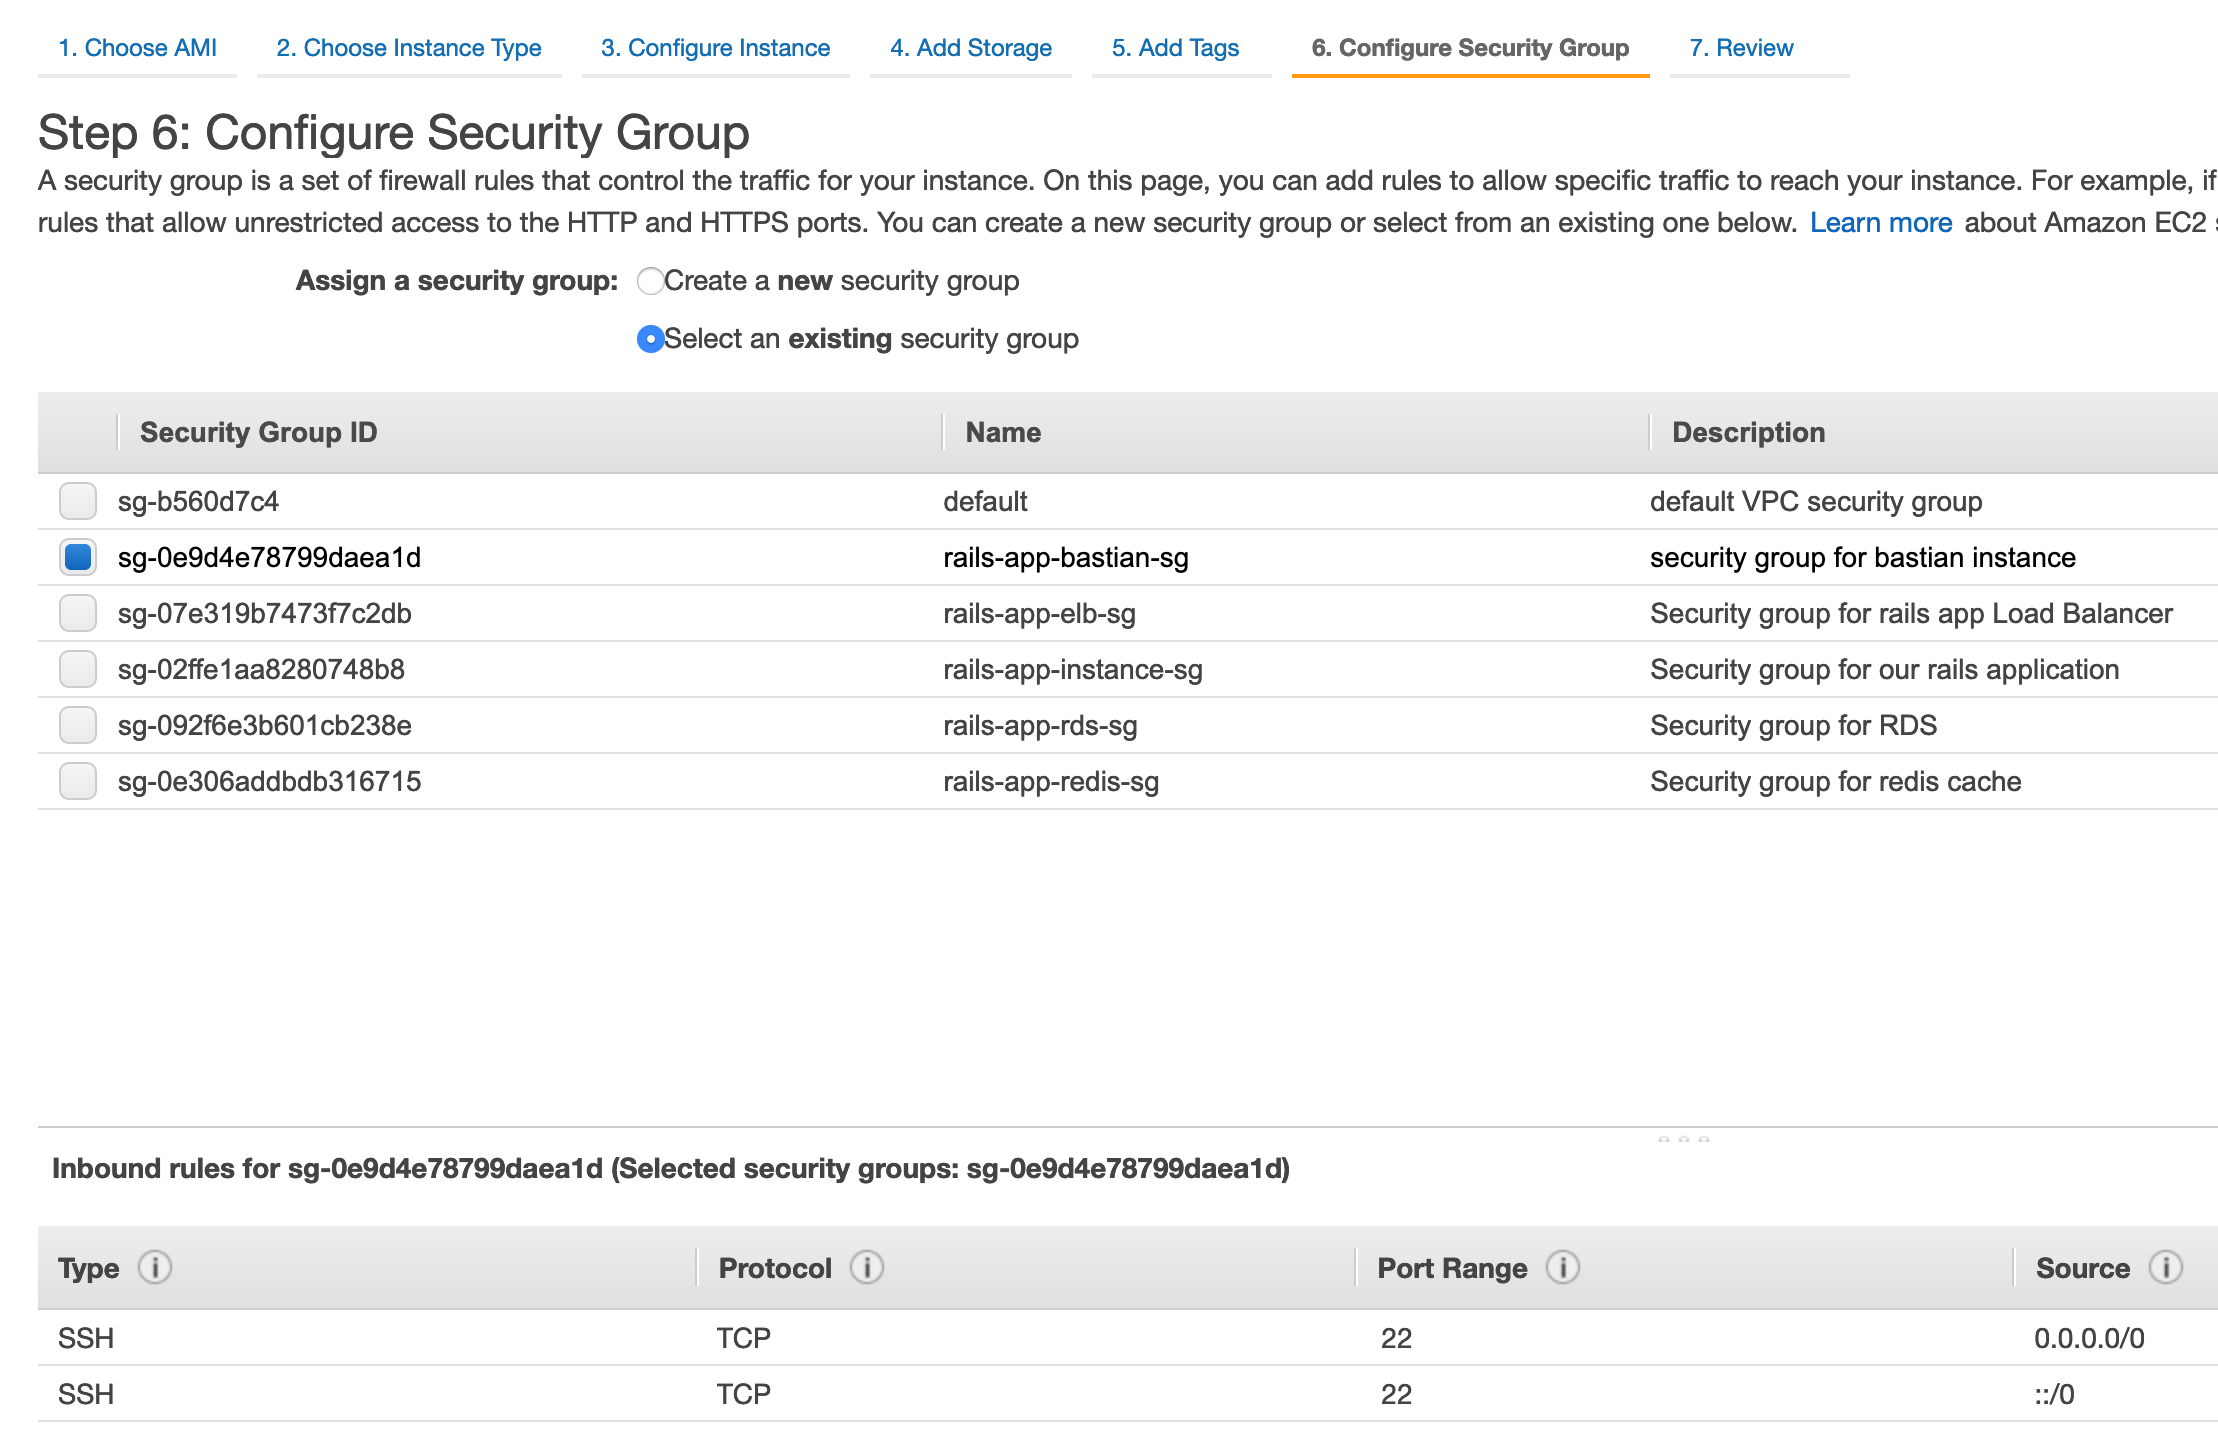
Make sure that you choose the bastian security group created earlier.

On the last step, choose the key pair we have created earlier.
Once you click on launch instance, the new instance should be added to our running instances.

Connect to the Bastian instance
Click on your bastian instance and copy the Public DNS URL

Go the the directory where you have download the Key Pair PEM file and run the following commands:
replace ec2-52-65-218-184.ap-southeast-2.compute.amazonaws.com with your public DNS.
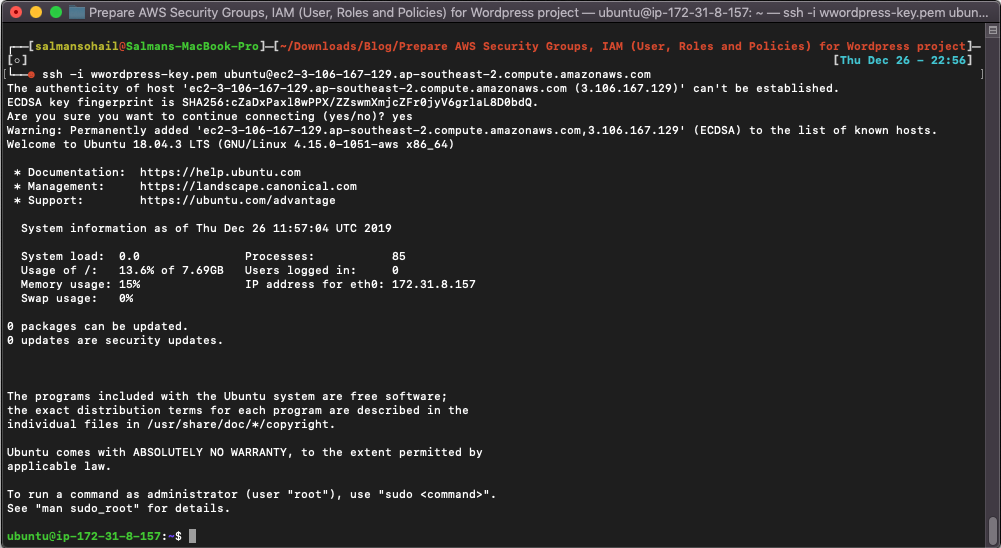
Our bastian instance is ready !! Sweet